Proxmox - LetsEncrypt SSL Certificates
Table of Contents
- Why?
- Requirements for an ACME (Lets Encrypt) SSL certificate in Proxmox
- Create a DNS A Record
- Get your Cloudflare Account ID
- Create a Cloudflare API Token
- Setup Proxmox Let’s Encrypt Accounts
- Add ACME Challenge Plugin for Cloudflare
- Add Domain Name for ACME Challenge
- Order Let’s Encrypt SSL Certificate Proxmox
- Certificate Renewal
- Conclusion
Why?
The “why” is simple; I prefer valid HTTPS certificates on all my HTTPS interfaces.
Is it necessary?
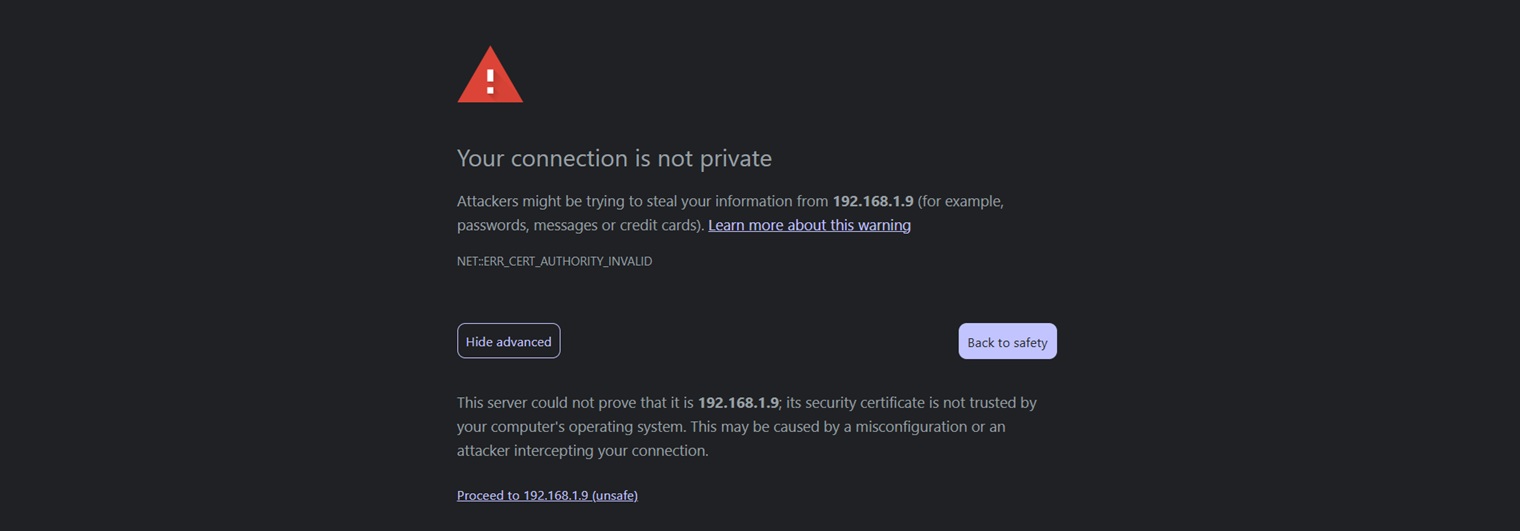
No, from a security perspective. A self-signed certifcate will give youi a secure, encrypted connection and so no data is transmitted in plain text over the network. However, a valid SSL certificate adds an layer of trust and gets rid of the annoying browser security warning associated with self-signed certificates.
Requirements for an ACME (Lets Encrypt) SSL certificate in Proxmox
Before proceeding with getting ACME SSL certificates within Proxmox, ensure that you have the following:
- A working Proxmox server (obviously)
- Domain Name - I use NameCheap for purchasing domains.
- A DNS Provider - I use Cloudflare (its free).
In this guide, I’ll be using Cloudflare as the DNS provider and so we’ll also need the following:
- Your Cloudflare Account ID
- Your Cloudflare API Token
Create a DNS A Record
Using Cloudflare as your DNS name server, we will need to create a DNS A record that points to your Proxmox server’s IP address.
To do this, login to your Cloudflare dashboard and under DNS tab, create a new DNS Type A record by clicking the Add Record button:

Then fill out the required details and click Save
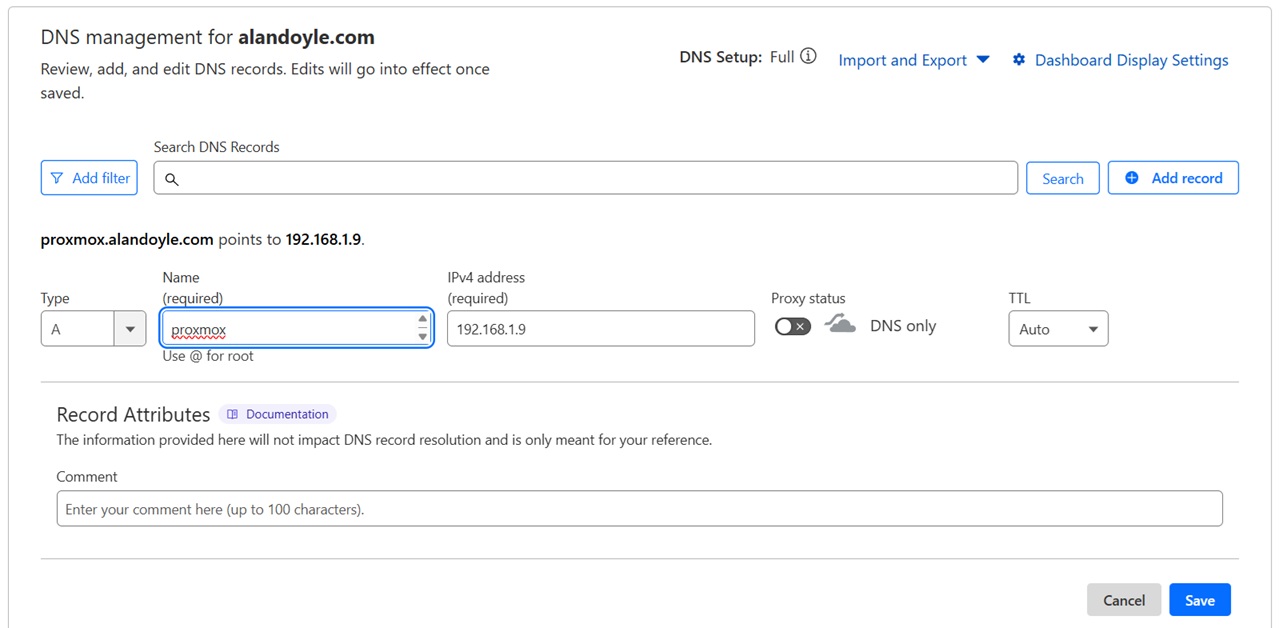
Required details
- Name (e.g. proxmox)
- IPv4 address (e.g 192.168.1.9 for domain to only work on the local network and fail outside your home/lab)
- Proxy Status (e.g MUST be DISABLED for internal IP address)
In the above example, my Proxmox server will be available at proxmox.alandoyle.com, which points to the internal IP address 192.168.1.9 and will only be available on my home network.
Usually, Cloudflare DNS records usually propagate very quickly (<5 min). But sometimes it can be longer (up to 24 hours) for DNS servers around the world to cache the information. This is why we are start with this the DNS record first.
Get your Cloudflare Account ID
Proxmox ACME SSL certificate creation needs your Cloudflare Account ID and an API Token. To get the Account ID, go to the Overview of the selected domain and scroll down to find the Account ID as shown below.
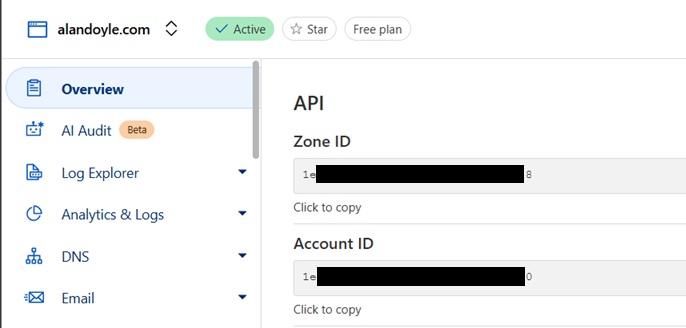
Save these details for later.
Create a Cloudflare API Token
Next, we will need to allow the Proxmox ACME protocol to create required DNS validation TXT DNS records. For this, you will need to create an API token on Cloudflare that Proxmox can use during domain validation.
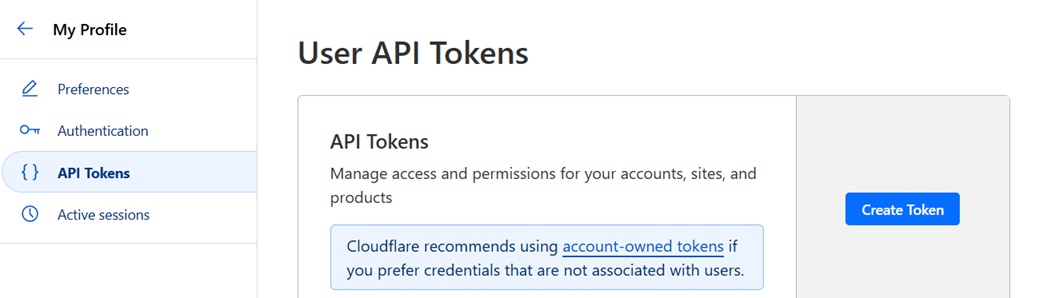
Right below where you found the Account ID from the Overview tab, you will find Get your API Token link, as shown below.
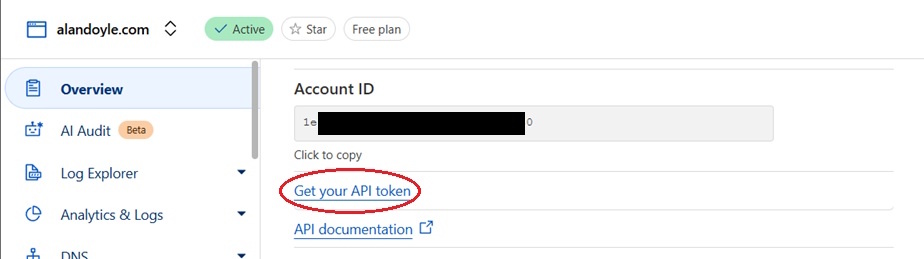
Click the Create Token button to begin:
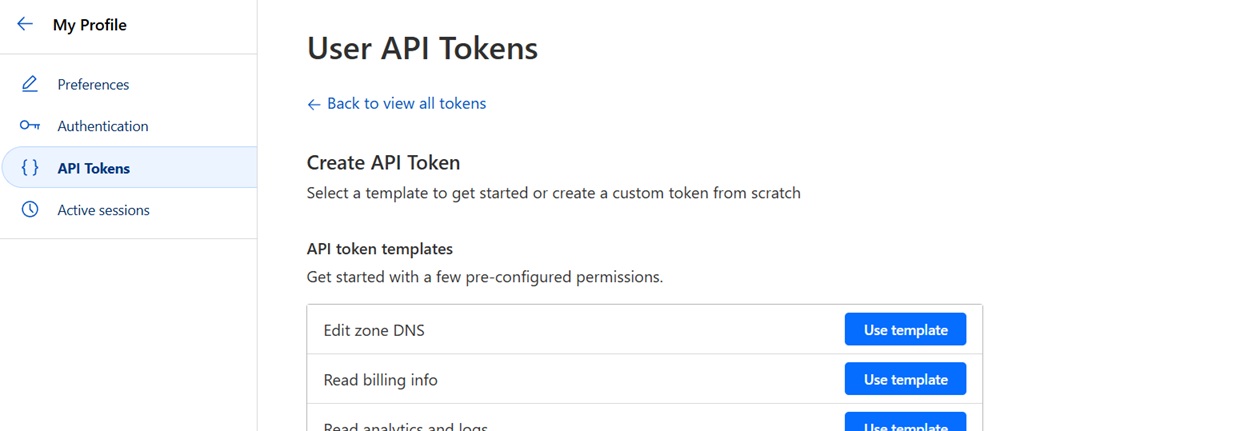
Cloudflare provides a lot of temoplates for their API Tokens but in this case the template we’re most interested in is Edit zone DNS, as shown:
On the User API Tokens page, click the small icon beside the text Token name: Edit zone DNS and change the name to something more suitable (e.g. Proxmox ACME certificate)

You will need to enable [Zone] [DNS] [Edit] and [Zone] [Zone] [Read] permissions for this token, as shown below:
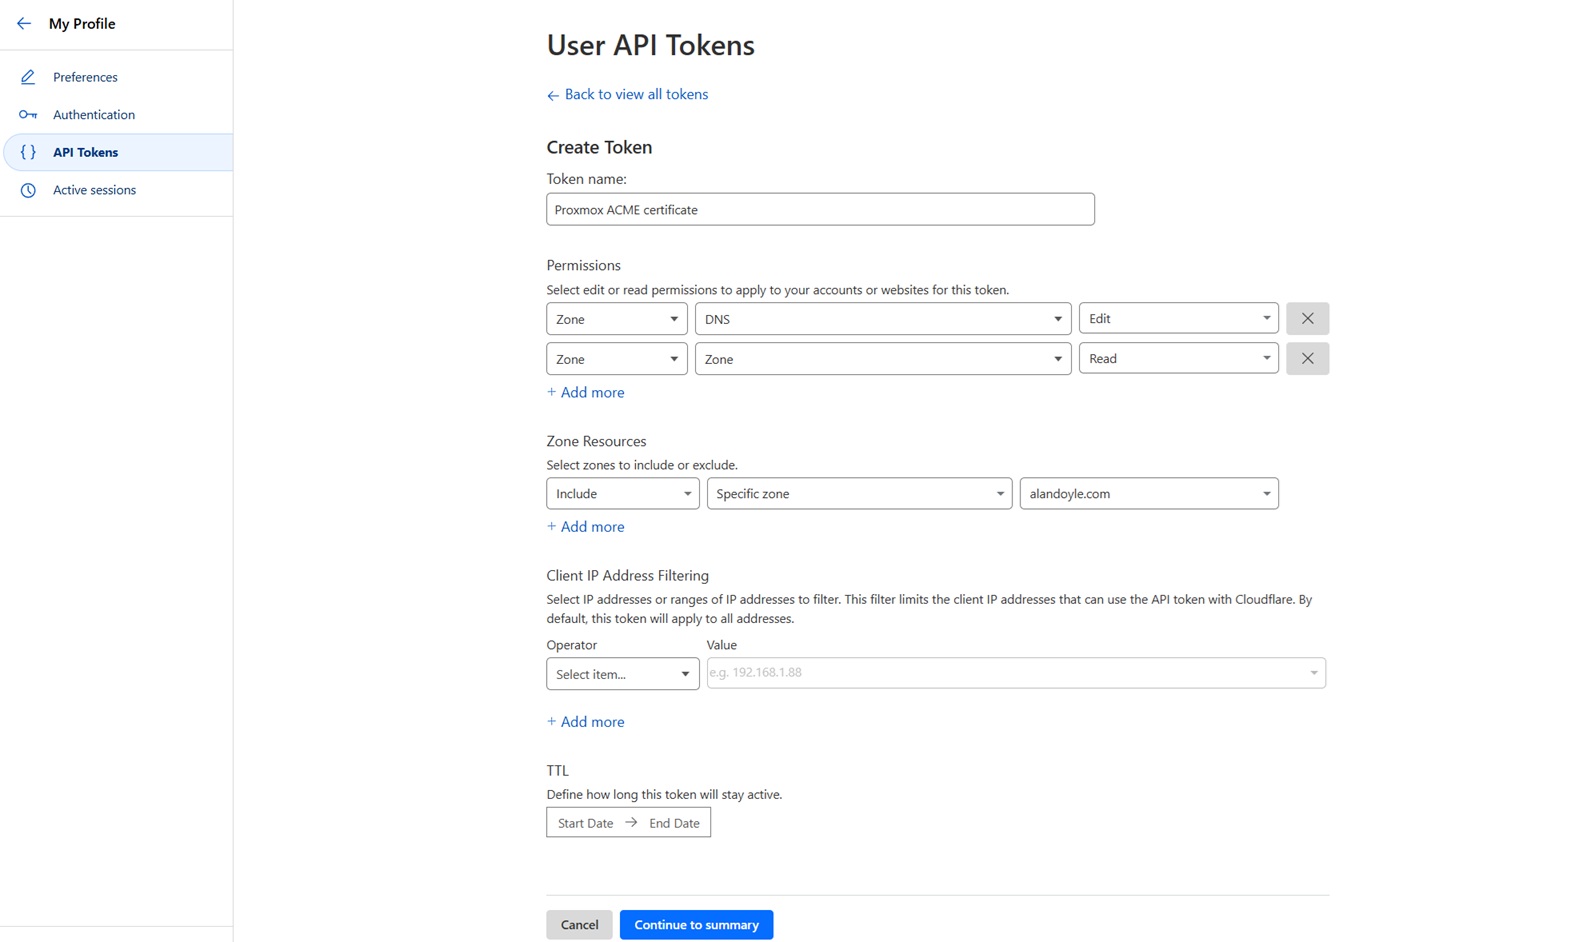
Recommended, for improved security restrict this token to only the root domain name of your Proxmox server (e.g. alandoyle.com), see above.
Click Continue to summary, then click Create Token to complete the API Token generation. Copy and save this token, as you did with the Accound ID previously. We will need this later, see below.
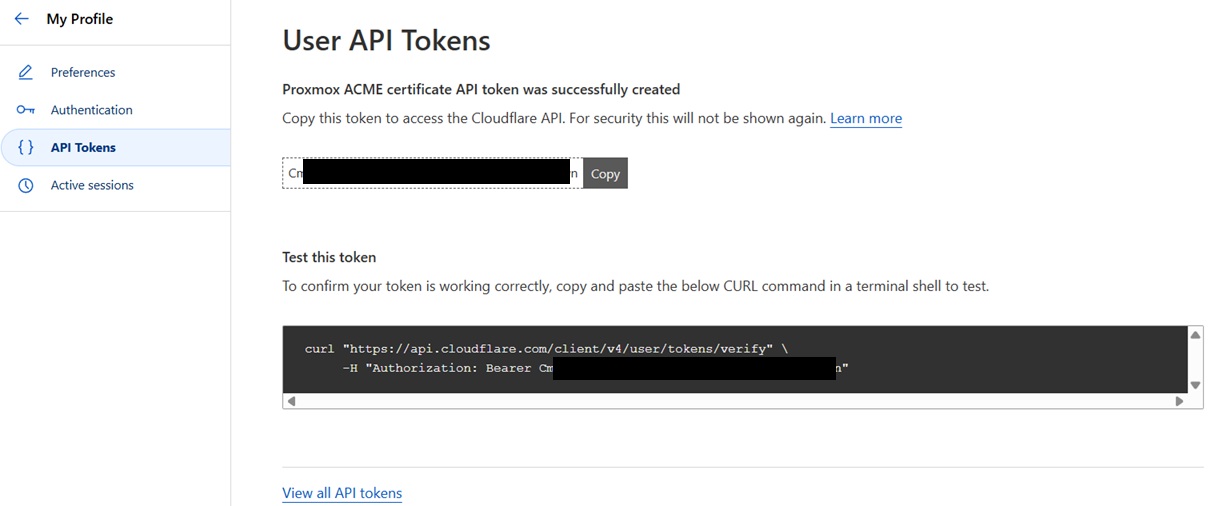
NOTE: Copy this API Token as there is no way to view it at a later date.
Setup Proxmox Let’s Encrypt Accounts
We need to create TWO accounts for LetsEncrypt: Staging and Production. Staging allows you to test before getting the real certificate. Staging is important because, if there are too many attempts, Let’s Encrypt will block you for a certain period of time.
To create the Let’s Encrypt accounts, go to Datacenter->ACME and click Add under Accounts.
First, we will add the staging account as shown below.
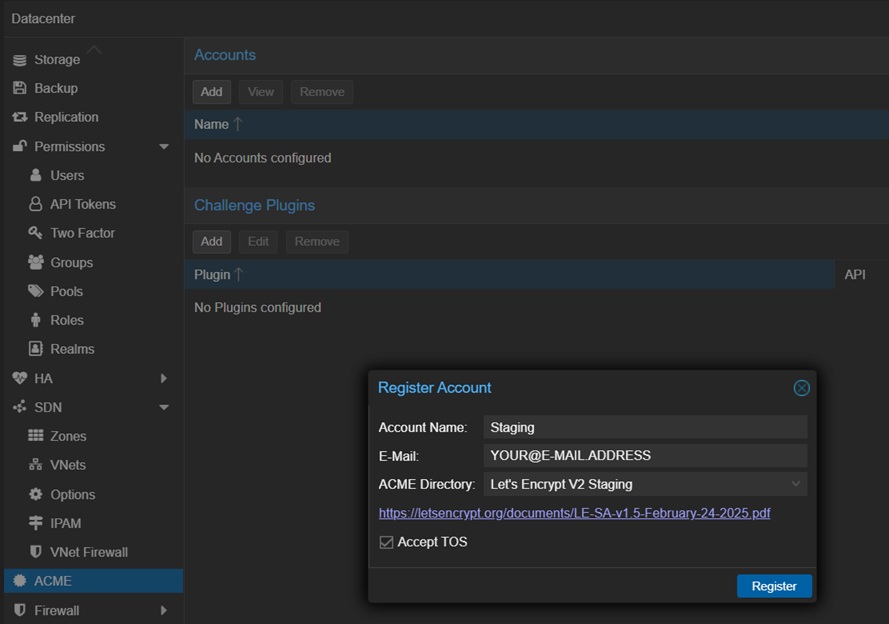
Provide something recognizable for Account Name (e.g. Staging). Email can be any valid email (it does not have to be on your domain). Then, choose Let’s Encrypt V2 Staging for ACME Directory, check Accept TOS and click Register.
Repeat the above steps but change the Account Name (e.g. Production). Again add a valid email. Then, choose Let’s Encrypt V2 for ACME Directory, check Accept TOS and click Register.
If successful, the Proxmox task viewer window should popup after clicking Register and say TASK OK. Simply close this popup to continue.
Add ACME Challenge Plugin for Cloudflare
Next, we are ready to verify that we own the domain, using ACME DNS-01 challenge. So we need to add the Cloudflare managed DNS plugin by clicking Add under Challenge Plugins.
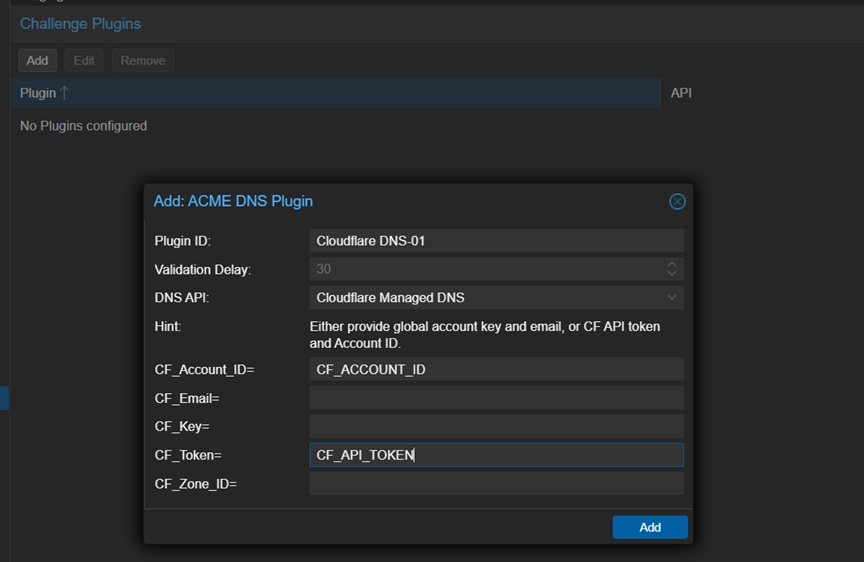
We are going to call this Cloudflare-DNS01 (no spaces allowed). Pick Cloudflare Managed DNS for DNS API. Finally, copy-paste the Account ID and Cloudflare API Token we stored previously and click the Add button to continue.
Add Domain Name for ACME Challenge
Now, go to the Node/Proxmox Host (not Datacenter), in this case mine is called sif and find the Certificates tab, see below.
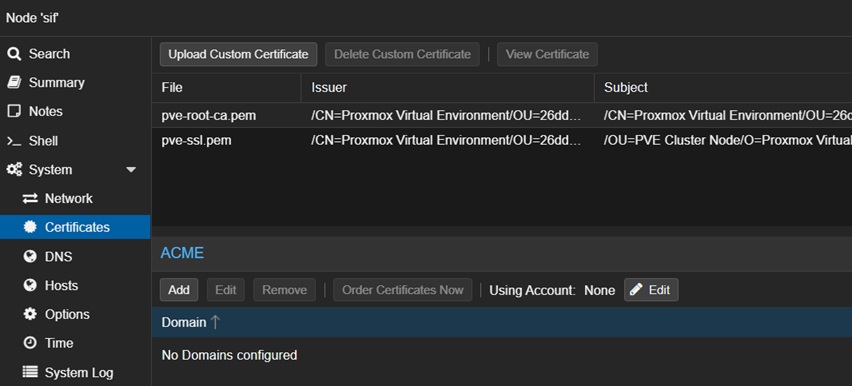
Edit the Using Account and pick the Staging account we created previously.
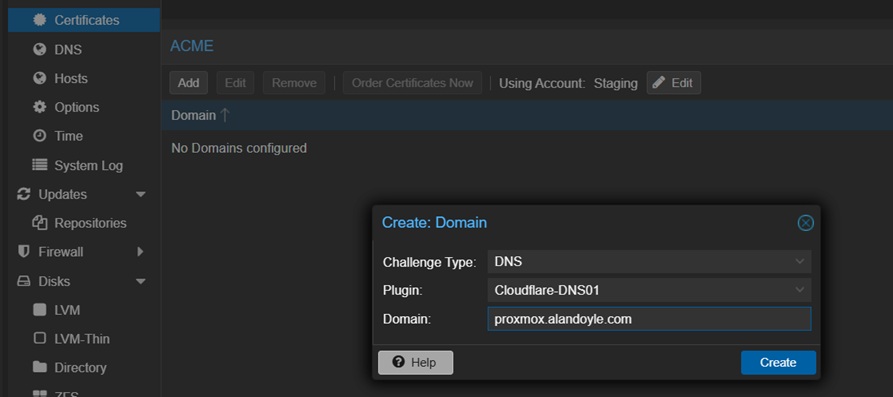
Next, click Add and add a domain as shown above. For Challenge Type pick DNS and for Plugin choose the one we added in the previous step (Cloudflare-DNS01).
Click Create to continue.
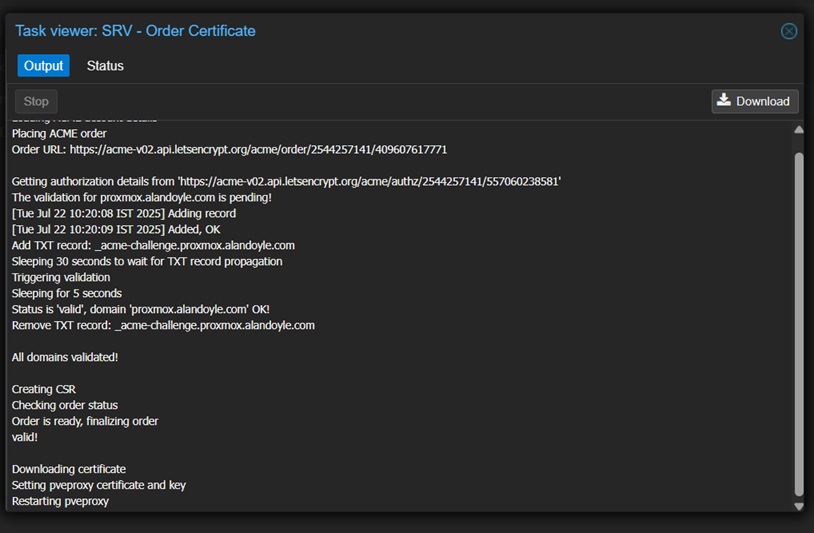
Order Let’s Encrypt SSL Certificate Proxmox
Highlight the domain you created (e.g. proxmox.alandoyle.com) and click Order Certificates Now. After few seconds or couple of minutes, the Proxmox task viewer should show that the certificates were download and end with TASK OK.
And finally, if the staging was successful, we can now order the real Proxmox SSL certificate.
Change the Using Account to Production we created previously. Then, highlight the domain and click Order Certificates Now., see below.
Certificate Renewal
After setting up Proxmox Let’s Encrypt certificates, you can basically forget about it. Renewal happens automatically in the background every few days.
Conclusion
Having valid SSL certificates for Proxmox is nicer, secure, and convenient compared to self-signed certificates which satisfies my Why?.

Written by Alan Doyle
March 1, 2025.